Posted on Leave a comment

Moroccan Chicken Pastilla

Growing up, I remember having a great desire to visit Morocco. I loved staring at pictures of beautiful rustic walls and open courtyards, and as soon as I had the chance to taste a Moroccan dish, I fell in love. I haven’t made it there yet, but the desire still lies within my heart. Is there a place you long to visit in the same way?

As I was searching for different dishes to make for our Amazing Africa journey, I was really intrigued by this Moroccan Chicken Pastilla from The Delicious Crescent. I haven’t made a lot of dishes with Phyllo Dough, but this one didn’t look too difficult, and as I read the list of spices that were included in the pastilla, my mouth started to water. It is an added bonus that I could make some Ras El Hanout spice mixture for this recipe and then use it for another recipe that I found in our lineup. Make sure to click on the links for both of these recipes if you want to try to make your own Pastilla!

Here is some of the process, keep your sound on for the crunch of the first slice:

One thing to remember about making something with Phyllo Dough…. take it out of the freezer the night before to let it thaw and set it out on the counter at least 4 hours before you want to make your Pastilla. I didn’t do that, so instead of making it all at once, I started it one night only to realize that I couldn’t finish it with frozen Phyllo Dough. This one was really fun because it’s topped with a little bit of cinnamon and sugar to make it savory and sweet, with the spices building underneath. Because of that, one of my pickiest daughters really liked this dish.

Find more recipes from countries all over Africa on our Amazing Africa Cast Iron Journey page. We are busy building the collection! Check out where our passion for Cast Iron started… it’s all because of the Kitchen Tallow.

Until next time, keep on cooking in cast iron! <3 Kate

Posted on Leave a comment

Libyan Shakshouka and Ftat Misrati

Over the course of the last few years, Shakshouka has been a feature on many menus in the home and in restaurants that serve breakfast. Chances are that you have tried one like I have and they are pretty good. Have you ever tried to make it for yourself?

This week for our Amazing Africa study, we made a Libyan inspired version of the popular dish, but what really elevated the cultural experience for our family was making some Libyan bread, Ftat Misrati to go along with it.

Here are the recipes that I found to cook in our Cast Iron pans:

Libyan Shakshouka from Keesha’s Kitchen, a really fun website loaded with yummy food to try

Ftat Misrati from Libyan Food, a blog dedicated to cultural delicacies from Libya

I stuffed our Shakshouka with even more eggs to feed our family of 6.

Like cooking food and exploring new recipes and flavors? Be a part of our Cast Iron Journey, through Africa and abroad. The Cast Iron Journey

Try our Kitchen Tallow for taking care of Cast Iron. Until next time, keep cooking in Cast Iron! <3 Kate

Posted on Leave a comment

Egyptian Koshari and Oom Ali

We have been studying our way through Africa with Heritage Mom’s Amazing Africa heritage pack and the other day I had an idea… why not spend some time traveling through Africa and trying some of the national food in Cast Iron while we study these amazing and diverse countries. So, we started with the first country in Amazing Africa: Egypt.

Before diving into a cast iron recipe, I wanted to make a meal famous in Egypt, one which my very good friend Remonda had told me about before, Koshari. Koshari is an Egyptian rice, lentil, and pasta dish that has chickpeas, a “salsa”, and fried onions on top. I made a recipe from Maral in the Kitchen and it turned out wonderfully. The kids adored the elbow macaroni and even became well versed in lentils through this dish. For Egyptians this dish makes a lot of sense, it’s filling, tasty, and uses ingredients that are not too expensive and readily found, without any need for meat, which is very expensive in Egypt.

For dessert, we used our Cast Iron to make Oom Ali (Uum Ali), often labeled as the Middle Eastern version of Bread Pudding, but I really feel that it is unique. Living in the Middle East for a number of years, if I went to an Iftar during Ramadan I would always find my way to the Uum Ali.

I found a recipe that spoke about the traditional Egyptian bread ingredient, rooa, but gave a great ingredient option for almost anywhere that you may live: croissants.

You can find this recipe over at I Knead to Eat and if you buy croissants that you need to make in the oven, just make sure that they are the large size because if they are too small your Oom Ali will be very soupy. We enjoyed the sliced pistachios and raisins adorning our Oom Ali very much.

Next time, we’ll make our way over to Libya cooking a very familiar Middle Eastern dish in the Libyan style. And, of course, we’ll use Cast Iron!

Until then, keep on cooking in Cast Iron! <3 Kate

Need something to season your Cast Iron and enjoy it a little more when it’s time to clean up? Head over to our shop and find our Kitchen Tallow!

Posted on Leave a comment

Short Ribs Potjie

Last week, I gave some good guidelines to start with when building your own Potjie, called Potjiekos from the Heart. Some things are better than a recipe and I love using some tried and true techniques in order to build new flavors and savor the well-loved flavors of my family. This is one combination that I recently built that worked really well, so I wanted to share it here.

Ingredients

  • Olive oil
  • Short ribs with bone-in (2.5-3 lbs)
  • Medium Onion
  • 2 Cloves Garlic, minced
  • Salt
  • Paprika
  • Cumin
  • Garlic Blend of spices
  • BBQ Blend of spices
  • 1/2-1 cup Tomato Puree
  • 4 pitted and chopped Dates
  • 250 mL broth
  • 1/2 cup Red Wine
  • Potatoes – baby or chopped up into cubes
  • Baby Carrots
  • Snow Peas

Method

Add some olive oil into the bottom of your Potjie to braise your short ribs. Turn the ribs to braise each side and then remove from the Potjie while you start your base.

Add a little more olive oil if needed and start cooking your onion and garlic until soft. Add in spices and cook until fragrant. Then add in the tomato puree and replace your meat back into the Potjie. Here I added 4 chopped dates to cut some of the acidity of the tomato. I also added 250 mL Broth. I cooked for 40 minutes with the lid on and then checked it, adding in 1/2 cup of red wine along with the cut potatoes and baby carrots. I replaced the lid and checked it again after 30 minutes, adding in the snow peas and cooked them until soft.

The result was delicious and something we ate with some white rice.

If you want to cook this in your oven, you can do that with a Dutch Oven and set the oven to 375*F.

Next we, will move all the way north to another African country- Egypt! Until then, keep cooking in Cast Iron! <3 Kate

For our Kitchen Tallow, check in the shop!

Posted on 1 Comment

Potjiekos from the Heart

Potjiekos is Afrikaans for small pot food. It’s cooked outdoors in a Potjie, a descendent of the Dutch Oven. I shared a little about the small pot last year in a Potjie Spirit Week post.

For our Cast Iron Journey this year, I wanted to find a good Potjiekos recipe to share, but I have to tell you a little secret… Potjiekos is cooked from the heart, and after trying a few “recipes” I was convinced that it’s just not the way to go. The beauty of a potjie is that there are a few guidelines to know and you grow from there. So here are some things I’ve learned about producing flavor in the small pot.

  • Bone-in is a plus when it comes to choosing your meat
  • Braising your meat first will only be a benefit to you later
  • After you braise your meat, take it out and start your onions and garlic. Once they are soft add in your spices to simmer together. Choose spices that offer a depth of flavor- some of our favorites are Smoked Paprika, Cumin, a favorite BBQ or Garlic blend, along with some good herbs, Oregano, Basil, and Salt and Pepper etc.
  • Once those spices are getting nice and fragrant build your stock with some tomato puree or sauce and some broth. You don’t want to add too much moisture because you will be cooking with the lid on and you don’t want to lose your flavor. You can always add more liquid during the cooking process. I know a lot of recipes that call for water, but I prefer broth every time.
  • Add your meat back in and let it cook. Last time, I added some chopped dates into this part to help add in a little bit of sweetness to take out the acidity of the tomato and it worked like a charm. I also added some red wine to my base stock.
  • After your meat has been cooking for awhile, then you can think about adding your harder veg like baby or squared potatoes, carrots, and root veg.
  • Your last addition will be your soft veg. Things like marrow or zucchini, peas or green beans.
  • During the adding stages, don’t over-stir your potjiekos- you’ll end up with mashed veg.

As my sister said this past week, “Let your dreams be your wings.” Take some time to think of what you like and build a recipe. Next week, I’ll give you the one that we have loved the most, but always remember, your taste buds and experience cooking your own food the way that you like it can be the greatest help in building a potjie from the heart.

Until next time, keep cooking in Cast Iron! <3 Kate

For more about our Cast Iron Journey and to find our Kitchen Tallow, make a stop here!

What’s in store for the next few weeks on the journey? Why not try some Uum Ali cooked in Cast Iron for a stop over in Egypt.

Posted on 1 Comment

A Giant Blueberry Muffin

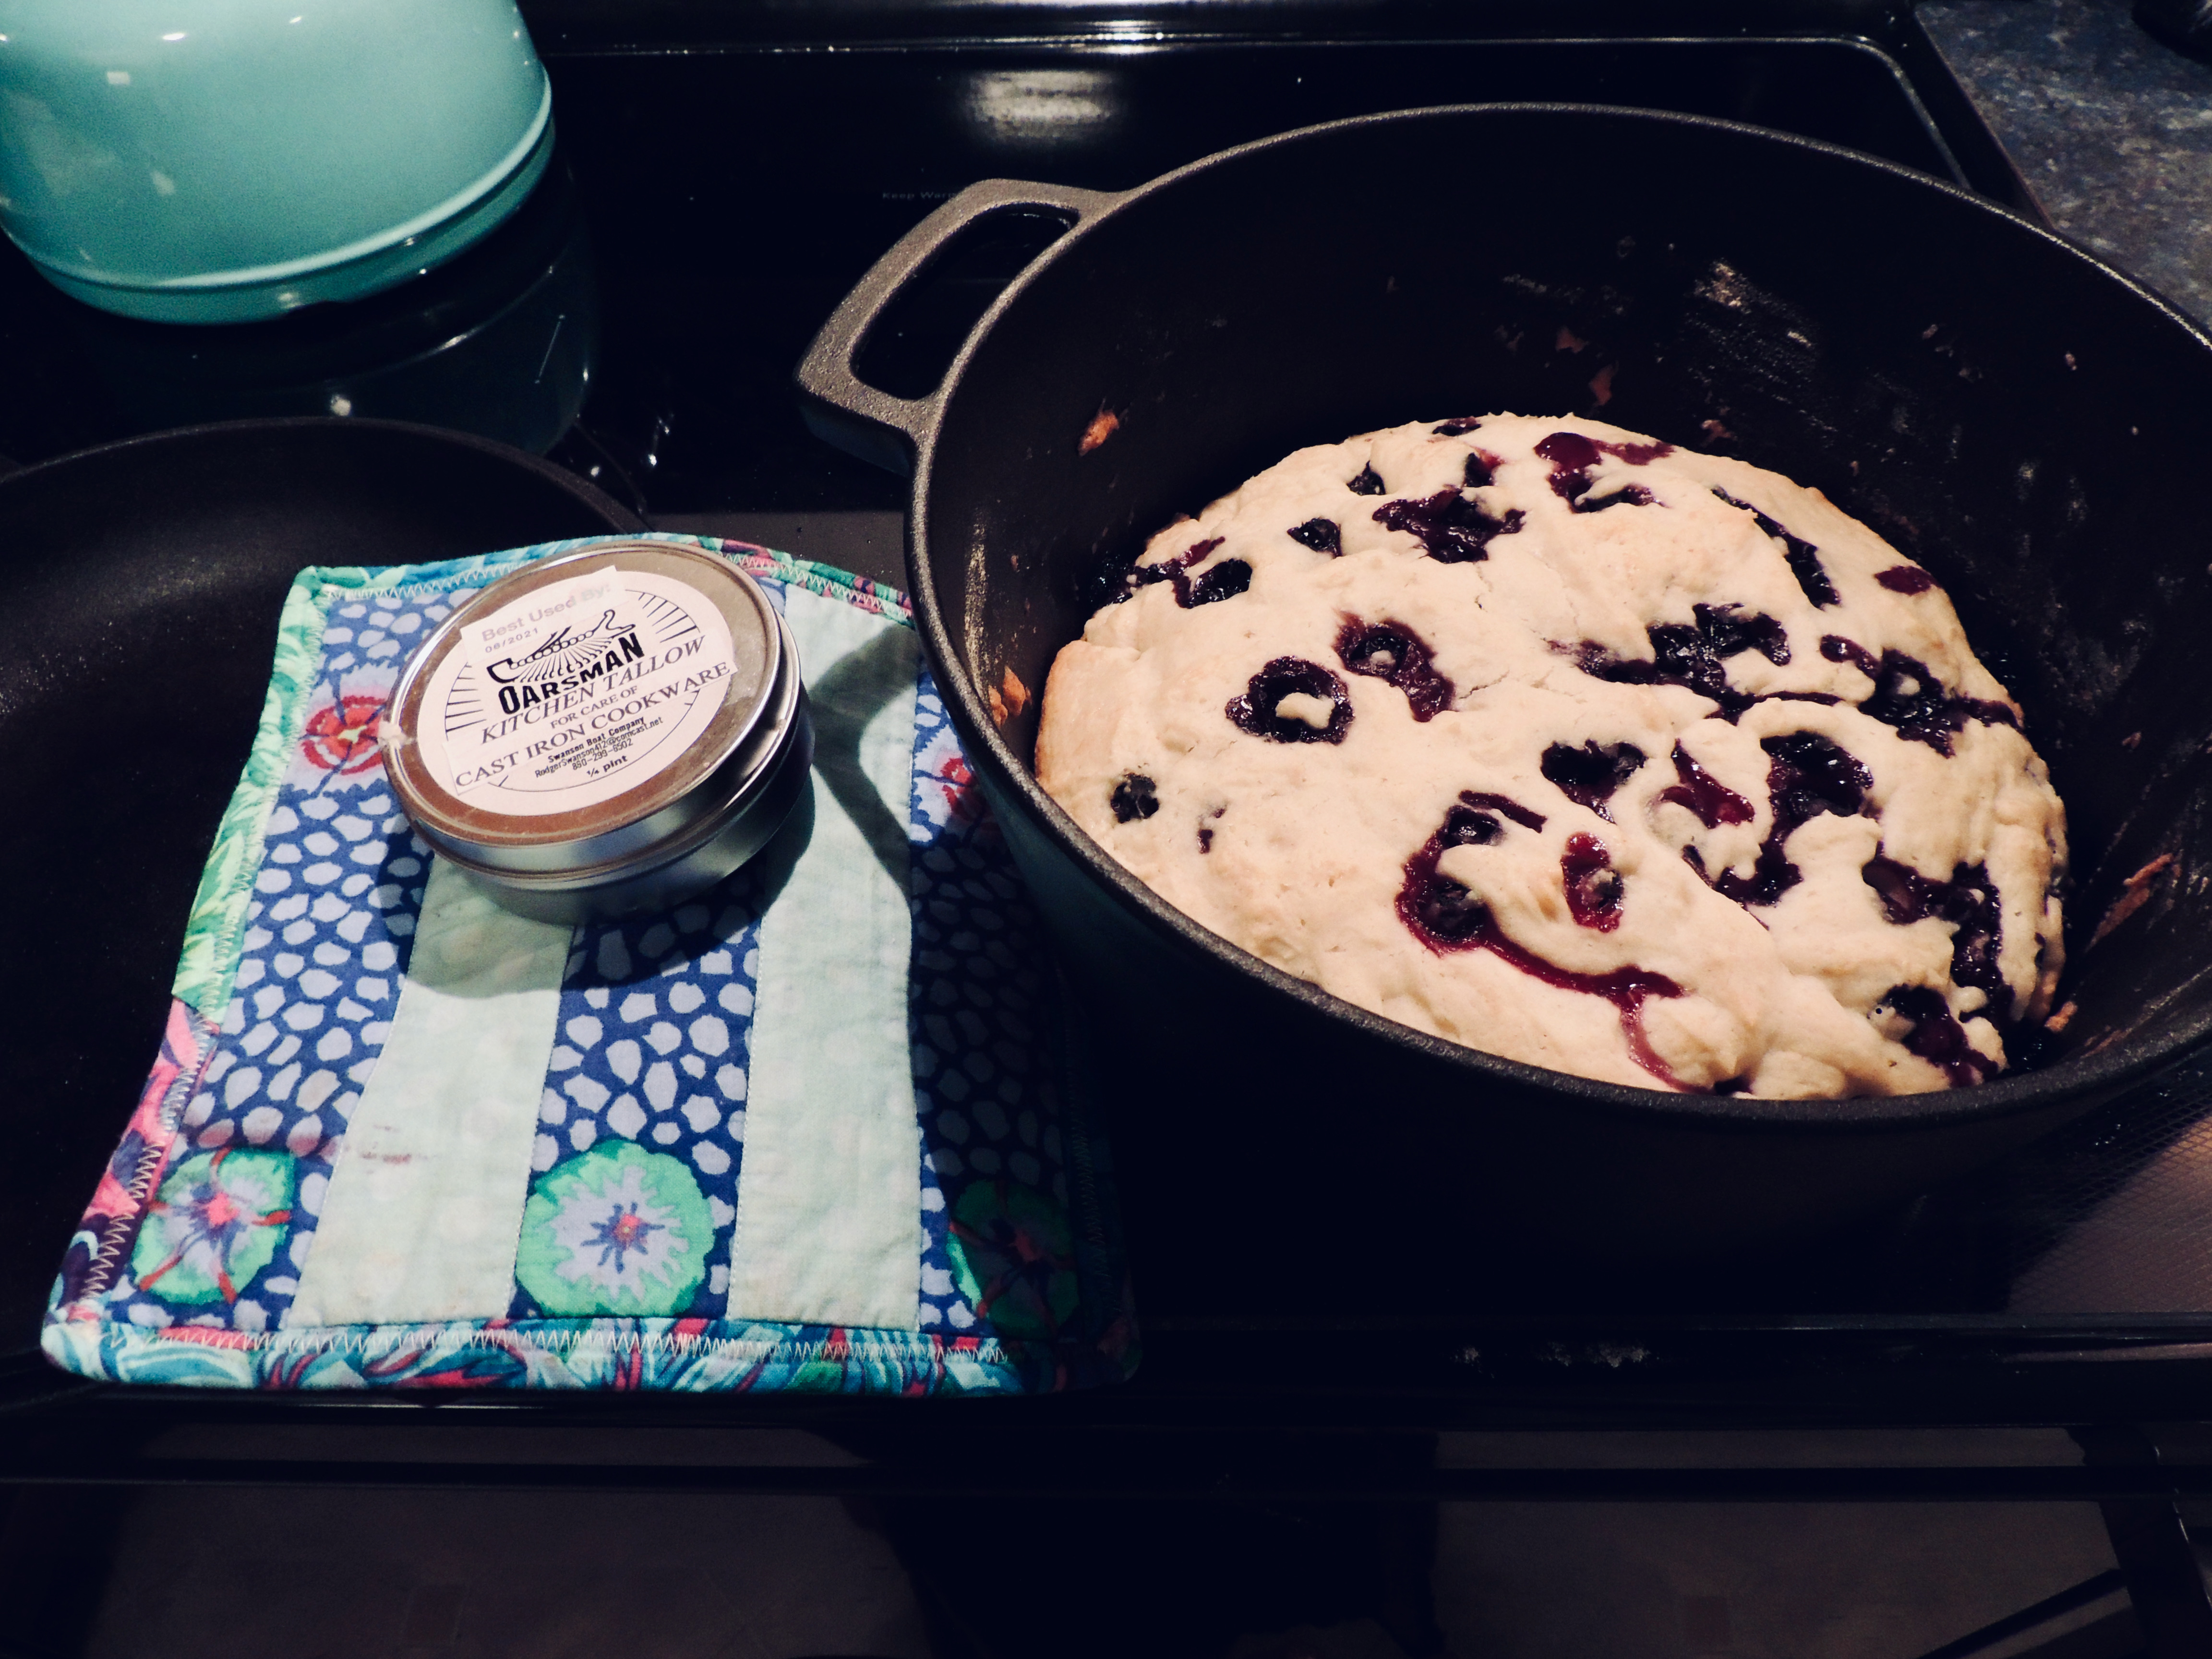
My husband and I were watching the series “The Ultimate Braai Master” on Netflix and we were inspired to try this recipe earlier in the week. Over the fire or in the oven, it’s simply a good idea. It’s a gigantic blueberry muffin with the same great taste, nostalgia, and a different kind of portability… the kind of ingredients that it’s easy to take camping.

I found the recipe over at Getaway magazine. It was a little difficult to research what “tots” might mean. I am under the impression that it’s something that Jan Braai has developed especially to help with potjie recipes and outdoor cooking. You need some melted butter and maybe you have a shot glass with you. A tot is a small amount of something like whiskey. So where the recipe says 3 tots melted butter, I used about 4 Tbsp. of melted butter and it worked!

My Dutch Oven Giant Blueberry Muffin…. yum

To make it in the Oven to 350* F, simply preheat your oven and then follow the directions for mixing and adding ingredients. Cover it with a lid and bake it in the oven. I baked it while we ate dinner and waited for that muffin smell to permeate the kitchen, checking it every now and then until it was a good golden brown muffin color.

We ate some for dessert that night and then for breakfast the next morning.

Until next time, keep cooking in Cast Iron <3 Kate

For recipe submission, where we taste test your cast iron favorites, and for information about our Kitchen Tallow, check on our Cast Iron Journey Page!

Posted on Leave a comment

Potbrood

When my husband and I got married, one of the first things that I received as a gift was the South African staple cookbook “Kook en geniet” by S. J. A. de Villiers. Originally written in Afrikaans, many have grown up and used this book for staple cultural recipes. This is where I first met a good Potbrood.

Are you familiar with the bread? I found an excellent history of Potbrood, highlighting it’s origin and original baking method. Boer settlers traveling across South Africa relied on their Cast Iron pots for cooking. A Cast Iron Potbrood was baked “inside a hole dug into the ground and lined with fire-hot coals.” This gigantic loaf can be shared and enjoyed, and would have been excellent source of sustenance on the move, conveniently baked in a Boer oven.

That’s where it started in South Africa, but it was perfected by the innumerable cultures found in the Rainbow Nation. I love this Potbrood video. It is the perfect mixture of teaching culture, showing that cooking is not just science but necessity and art, and because it’s always a pleasure to see how someone makes a traditional recipe in the bush! Check it out for yourself:

EcoTraining

I have made a few of these myself over the years and I wanted to share how to make it. The recipe can be cooked in the oven or over a fire. Instead of constructing an underground oven, these days people use the coals of a fire placing them under and over the Dutch Oven pot like in the video above.

If you need a recipe for the bread I can recommend that the place to start is with a good White Bread Dough recipe that yields enough for 2 loaves. There is a good recipe found in the “Kook en geniet” on p. 82. It’s a basic bread dough calling for flour, sugar, salt, Instant Yeast, oil, water, and an egg wash.

Oven Method

  • After making your dough and letting it double in size, get your Dutch Oven (I used a 5 qt Dutch Oven) ready by greasing the inside.
  • Place your dough inside, letting it rise again until it matches the height of your pot.
  • Heat your oven to 400* F and grease your Dutch Oven lid. Place the covered Potbrood in your oven and cook. You’ll know that it is done when a knife is removed clean from the brood and I can always smell it’s done (you know what I mean if you’ve baked bread before).
  • You can remove the lid for the last few minutes for a nicer brown on top if necessary.

My aim as we travel on this journey is to highlight culture and to support the passing on of traditional knowledge. In our progress forward, we never want to forget. We want to remember and savor the good things and pass them onto our children. If you have a traditional recipe featuring your Cast Iron pots, please let us know by submitting your recipe to be tried and featured on our journey. You can find the place to submit a recipe here:

Part of our family journey has been finding help in Tallow to maintain and season our cast iron, you can find more about that here:

Posted on Leave a comment

Loaded Veggie Skillet, USA

The traditional USA breakfast skillet is immortalized in diners across the country. I have had some delicious versions here in Illinois: a Mexican skillet, Cowboy skillet, and Mediterranean skillet.

This recipe was submitted by one of our Cast Iron Journey members, Sarah, and is loaded with so many good and nutritious vegetables. It’s great for anyone who wants to add some more vegetables to their breakfast line-up and I even added some extra when I made it for my family.

Let us know how you like it when you try and please submit your favorite Breakfast Skillet recipe here. We love getting new recipes to try and enjoy!

Ingredients

2 potatoes, scrubbed, skinned and cubed
3 tbsp olive oil, divided
1/2 tbsp sea salt, divided 
1/2 tsp black pepper, divided
1 sm. Onion thinly sliced (I chopped this one finely because my family prefers it that way)
1 med green pepper thinly sliced (or chopped)
1 med red pepper thinly sliced (or chopped)
3 LGBT portobello mushrooms sliced
1 tsp oregano (I used fresh)
2 cloves garlic minced
1/4 tsp red chili flakes (optional; since we have four little ones who shrink away at spice, my husband and I added this at the end)
2 cup spinach
4 lg eggs
2 tbsp lemon juice 

Method

Preheat oven 400*
Place potatoes on baking sheet, pour 2 tbsp oil over potatoes add 1/4 tsp pepper. Toss well then bake 30 minutes turning half way through.  
While potatoes roast cook veggies. 
Heat remaining oil in skillet, add onion and cook over medium heat until soft about 10 minutes. 
Add peppers and cook 5 minutes. Once peppers are soft add mushrooms, garlic, oregano, salt, pepper and chili flakes. (I chopped up some tomato and added it here as well, we loved it with the tomato). Cook 5 minutes. 
Add 1 cup spinach let wilt and add rest of spinach. Add lemon juice and stir well.. 
Once potatoes are cooked transfer to skillet and stir well. 
Make 4 wells in skillet, break eggs into each well. Place lid over skillet. Once eggs are cooked to desire turn off heat.
Serve. I made it along with some breakfast sausage and it was very delicious!

What is your favorite Breakfast Skillet Recipe?

Until next time, keep cooking in Cast Iron <3 Kate

For help with your Cast Iron seasoning and maintenance try our Kitchen Tallow:
Posted on 1 Comment

Rum Raisin Bread Pudding

Last week I spent some time testing recipes for our first leg of the Cast Iron Journey this year. This one was definitely a winner. With soft bread, first buttered with a mixture of cinnamon-sugar butter, layered into the pot, covered with a coconut milk custard and drizzled with rum soaked raisins. This is definitely one that will be enjoyed again by our family.

I found this delicious recipe from Jan Braai. Every year on September 24, many celebrate National Braai Day, uniting together over the fire. I love anything that brings people from diverse backgrounds together in a common interest, so you know I’ll share some posts about this one later in the year. His delicious recipe can be found here on his website and he gives step by step instructions about how to make this Rum Raisin pudding over a fire. I have some directions below for making it in the oven when you don’t have a fire to use.

Oven Method

Buttering my bread with the cinnamon-sugar butter mixture

I used my Dutch Oven to make this delicious dessert in our oven following the directions for the Potjie recipe. To bake, I set my oven to 350 F and baked the pudding in the middle of my oven with the lid on top for 45 minutes until the custard was set and everything was baked through. Then I removed the lid and broiled on low for about 5 minutes watching that it didn’t burn. (Every oven’s broiler is different and mine is electric so be careful here.)

Rum Raisin goodness!

Until then, keep cooking in Cast Iron! <3 Kate

Posted on Leave a comment

Continuing the Journey

I love cast iron.  It has such a rich history all over the world.  It sautés and cooks beautifully on the stovetop, can be transferred to the oven without a problem, and handles outdoor cooking like a champ.  Not only that but it is one of my favorite things to cook with because it’s easy for me to take care of, although I wouldn’t have said that a few years ago, but it is virtually indestructible once you know how to care for it.

There is so much more my family and I want to explore in the world of cooking because of the enjoyment it brings us. Cooking should and can be a social thing for us but too often it turns into a boring and annoying necessity in the hustle and bustle of our daily lives.

Last year we began the Cast Iron Journey as a way to bring some light into a dark season.  With isolation and seclusion becoming the norm for all of us as we wrestled with life during the pandemic, we wanted to focus on something positive on social media and to bring each other into our kitchens.

This year we want to continue and revitalize our journey.  Weekly recipes became harder for me to post after moving house and then after things started to open up again and life seemed to resume to normal.  But, what is normal?  None of us is really sure at this point.

This year our Cast Iron Journey is going to take on a cultural spin as we start to embark on the role and recipes of cast iron around the world.  We would love contributions and involvement in this, so please- don’t just watch from afar, post your thoughts, recipes, fears and love of cast iron, and join us on this journey!  We will dive into much more than the culture of food in our journey, as well, so stay tuned!

Our first country to enjoy together will be one of our family favorites and traditions- the country of South Africa.  With such a beautiful and diverse country, full of so much rich culture, we may linger a little longer if others want to join.  Click below on our recipe submission, and we will spotlight your recipe and thoughts on our Blog, Instagram and Facebook group.