The other day I started an embroidery piece with some inspiration: a sparrow at our bird feeder. Our family has a love for birds, which you could see if you browsed my website blog… I found the perfect fabric and wanted to add embroidered details so that it would look just like the platform bird feeder in our backyard during winter, which has served neighborhood birds long before we moved in!
Let me share a bit of the process to give you inspiration as you make your own embroidery design inspired by nature, your life, and the things that you love!
Embroidering My Platform Bird Feeder
Before starting my stitches, I outlined my platform feeder’s shape using a Frixion pen that can be erased with the heat of an iron. You can see a little bit of the pen peeking out at the bottom right corner of the feeder. To remove, you simply put a little heat on it from your iron.
It is a good idea to give yourself some shape when doing some freestyle embroidery. That way, you don’t start to veer off course, especially when it’s a geometrical structure like this one.

Then, I proceeded to fill in the shapes with stitches.
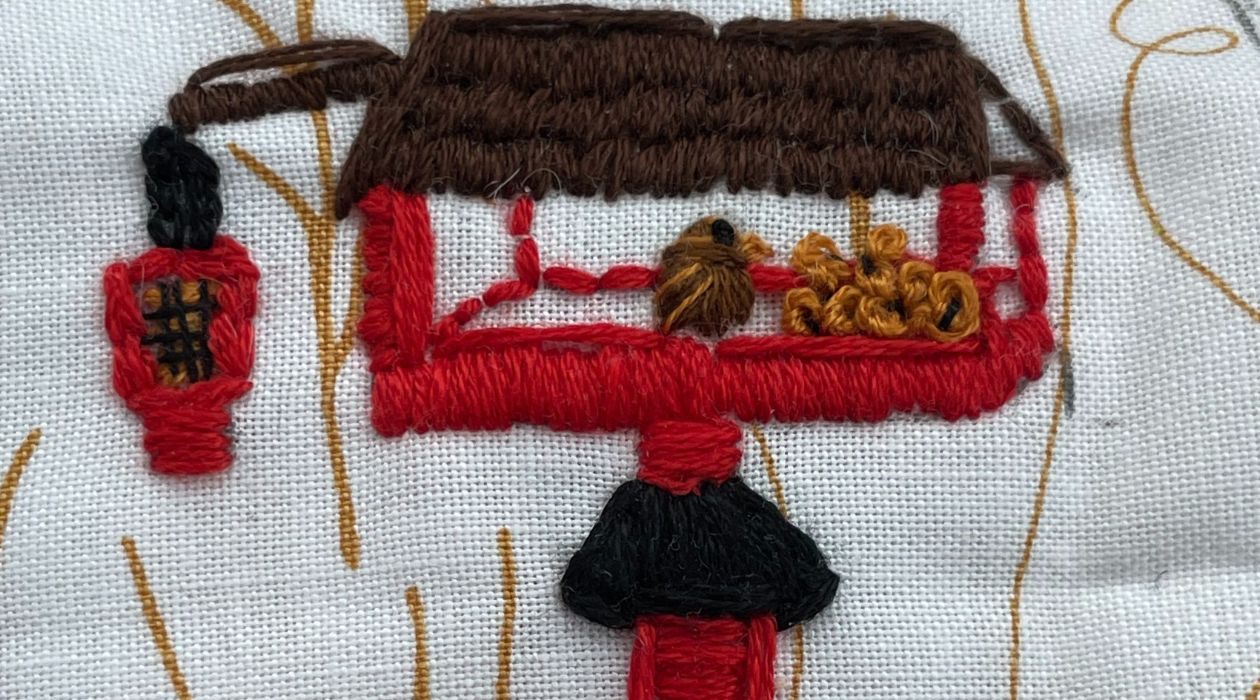
I used 6 strands of embroidery floss and satin stitches to fill in the large pole, baffle, platform, roof, and hanging suet feeder.
To give the shapes definition, I added some long stitches along the stain stitches.
Watch as I fill in the details!
Embroidering Seed and Suet

I filled in the suet feeder with suet using 3 strands and satin stitches.
Then made a pile of bird seed using French knots.
Our bird feeder always looks like this: the seed pushed to the right corner!

Then using only 1 strand, I made the wire of the suet feeder with some black floss and long stitches.
Embroidering Winter Details
Because of the fabric I used (Alison Glass’s Sunprint Whisper Sticks and Twine) and the winter season, I wanted to add snow and some little footprints.

Snow was 6 strands and satin stitches. I focused on making it look like a little pile of fresh snow.
Footprints were 2 strands using a Flying V stitch.
Embroidering the Sparrow

First I drew an outline of my sparrow’s body using my Frixion pen. It looked like a little kidney bean.
Then using 3 strands, I started to make the main body shape of the bird with satin stitches.
If you look closely at the little sparrow in the next picture, you’ll see I used 3 strands to define his wing and shoulder stitching from the right side of his body down in the manner of his wing to the bottom left.

I then used 1 golden strand to give him some highlights in his feathers, following the direction of my wing and head stitches.
His beak is a Flying V stitch, then filled in.
I gave him a dark eye at the end with a small French knot.
This was a really fun little project! I can’t wait to show you what I did with the embroidered feeder and sparrow next!

Until next time, keep embroidering <3 Kate
One response to “How to Embroider a Sparrow and Feeder”
[…] I love to find new ways to use my embroidery projects because each one lends itself to so much inspiration! You can find my process for this little bird feeder and friend on my blog here. […]